Windows has a couple of built in tools which can be used to record network traffic and save it to disk. Netsh is available on Windows 7 and above, and pktmon is available in Windows 10. These are useful since installing Wireshark or tcpdump on a remote system isn’t always possible. Both require administrative level access to the system to run.
NETSH Capture
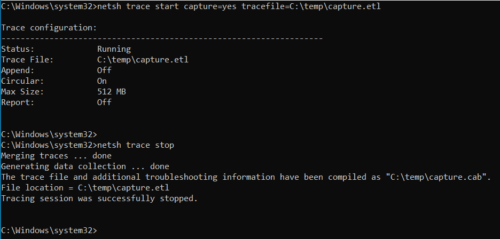
Start capturing packets with the following command.
netsh trace start capture=yes tracefile=C:\temp\capture.etl
Traffic can be filtered by a particular IP address.
netsh trace start capture=yes IPv4.Address=X.X.X.X
Stop the capture to save files to disk.
netsh trace stop
This will produce an ETL file that will need to be converted to a PCAP. This can be done with an open source tool, cunningly named etl2pcapng.
etl2pcapng.exe C:\temp\capture.etl C:\temp\capture.pcapng
The resulting capture file should then open in Wireshark.
PKTMON Capture
pktmon is available in Windows 10 version 1809 and above.
Filters can be setup based on ports, protocols and hosts:
pktmon filter add
[-m [mac2]]
[-d { IPv4 | IPv6 | number }]
[-t { TCP [flags…] | UDP | ICMP | ICMPv6 | number }]
[-i [ip2]]
[-p [port2]]
[-b]
[-e [port]]
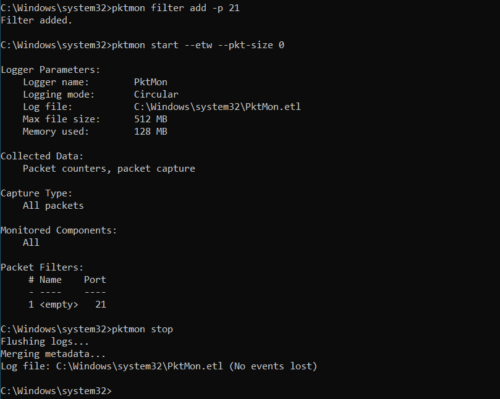
For example, the following filter would capture traffic on port 21:
pktmon filter add -p 21
Existing filters can be listed with:
pktmon filter list
The below commands will start and stop capture. By default only the start of each packet is captured, adding the –pkt-size 0 flag ensures the whole packet is recorded:
pktmon filter add -p 21
pktmon filter list
pktmon start --etw --pkt-size 0
pktmon stop
The traffic will be recorded as an ETL file. This can be converted to a pcapng using:
pktmon pcapng capturefile.etl -o capturefile.pcapng